How to Merge Photo and Signature for Job & Exam Forms Online (Free)

You’ve filled in every field on a job or exam application form. Name, CNIC, education, experience all done. Then you hit the upload section and it asks for something oddly specific: your photograph and your signature, combined into a single image, under a set file size like 50KB. Not two separate uploads. One file. And if it’s even slightly off wrong order, too large, wrong shape the portal either rejects it outright or the field just won’t accept the file at all.
This trips up more applicants than it should, mostly because nobody explains it clearly anywhere. Here’s the full breakdown: why forms ask for this, how to build the file correctly, and the mistakes that cause silent rejections.
Why Forms Want Photo and Signature as One File
Recruitment portals, testing services, and government application systems process thousands of submissions. Reviewing two separate uploads per candidate one photo field, one signature field doubles the manual checking work on their end, and doubles the chances of a mismatch (wrong signature attached to wrong candidate, files swapped during upload, and so on).
Combining both into a single image solves that from the portal’s side: one file, one review, one place to verify that the photo and the signature both belong to the same application. It’s an administrative shortcut for them, which is exactly why it shows up so often on testing service portals, recruitment boards, and university admission systems.
What These Forms Actually Ask For
Every portal writes its own specification, and it genuinely does vary — this isn’t a case where one universal number applies everywhere. That said, most requirements follow the same general pattern:
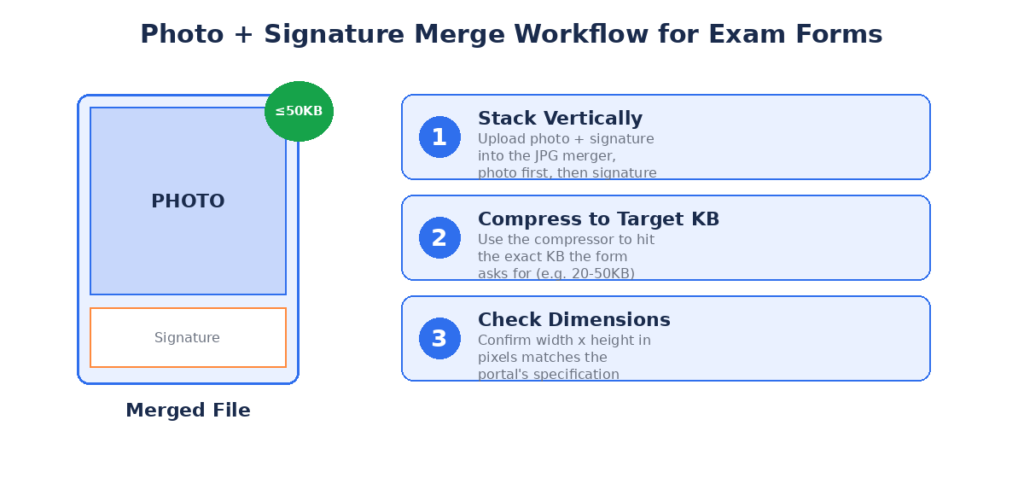
- Layout: photograph on top, signature directly below it, no gap large enough to look like two separate images stitched carelessly together.
- Format: JPG or JPEG almost universally. PNG is rejected by a surprising number of portals even when the notification doesn’t explicitly say so, because their backend validation checks the file extension against a fixed list.
- File size: typically somewhere in the 20KB–100KB range for the combined file, though a handful of portals allow more.
- Dimensions: usually specified in pixels or centimeters, often tied to a DPI value (commonly 200 DPI for most government-style portals).
The one rule that matters more than any specific number: always check the exact notification or instructions for the form you’re filling, not a general guide like this one. Boards update their requirements between recruitment cycles, and submitting against last year’s numbers is a common, entirely avoidable mistake.
Building the File: Step by Step
You don’t need specialized signature-merging software for this a general JPG merge tool plus a compressor covers the whole job.
Step 1 — Get clean source images.
Scan your signature on plain white paper, or photograph it in good light with your phone and crop tightly around it. Avoid signing on lined or colored paper; the background needs to read as clean white once merged. For the photograph, use a proper passport-style photo — not a casual selfie — since most portals reject informal photos during manual review even if the automated file check passes.
Step 2 — Match the widths before merging.
If your photo is 600px wide and your signature scan is 1800px wide, merging them without adjusting first will either stretch one image awkwardly or leave a mismatched, unprofessional-looking result. Resize the signature to roughly match the photo’s width first using an image resizer, so the final file looks like one coherent document rather than two images taped together.
Step 3 — Merge vertically.
Open the JPG merger, upload the photo first and the signature second (order matters — this determines which one ends up on top), select the vertical layout, and merge. Keep the spacing minimal so the result reads as a single clean image rather than two panels with a visible gap.
Step 4 — Compress to the exact KB limit.
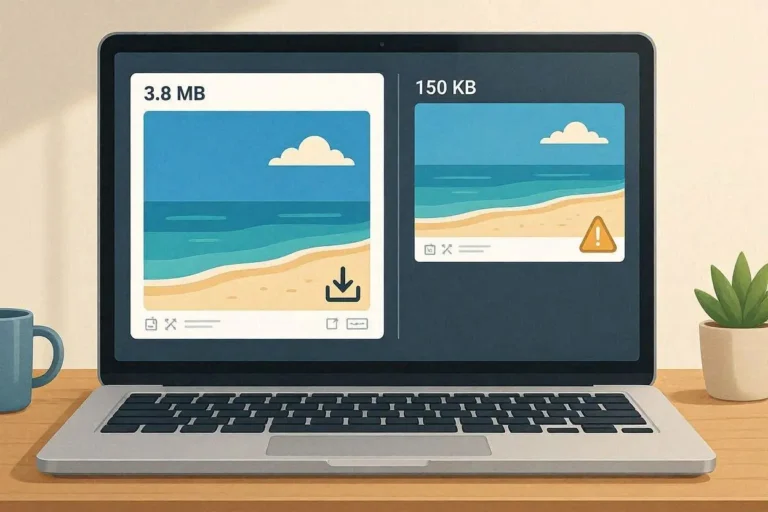
This is the step most people get wrong. A merged JPG straight out of a merge tool is often well above the 20-50KB range these forms ask for. Run the output through the JPG compressor and target the specific KB number your form’s instructions state most compressors, including this one, let you compress to a set size rather than just an approximate percentage.
Step 5 — Verify before uploading.
Check the final file’s properties (right-click → Properties on Windows, or Get Info on Mac) and confirm both the KB size and pixel dimensions match what the form asked for. Don’t rely on how the image looks on screen a file can look fine and still fail a strict backend size check.
The Mistakes That Cause Silent Rejections
Compressing before merging instead of after.
If you compress the photo and signature separately first, then merge them, the combined file usually ends up larger than expected because the merge process re-encodes the image. Always compress last, after the merge, to hit your target size accurately.
Uploading a PNG because “it looked better.”
PNG preserves sharper edges around signature strokes, which is genuinely tempting. But if the portal’s backend only accepts .jpg or .jpeg, a PNG renamed to .jpg isn’t the same thing the file header still identifies it as PNG, and stricter validators catch that mismatch even if a quick glance doesn’t.
Signature too small relative to the photo.
When the signature panel is squeezed into a tiny sliver at the bottom to save file size, it often becomes illegible after compression. Reviewers manually check that a signature is actually readable an illegible signature can get an application flagged even if the file technically passed the automated size check.
Ignoring the DPI requirement.
A handful of stricter portals check for exact DPI metadata, not just pixel dimensions. This mostly comes up with government and testing-service forms rather than casual job portals, but it’s worth checking the notification for a DPI figure specifically before assuming pixel dimensions alone are enough.
Signing on the wrong background.
A signature photographed on ruled notebook paper, a receipt, or anything with visible lines or texture behind it looks unprofessional once merged next to a formal photograph and on some stricter portals, a visibly non-white background is itself grounds for rejection.
If the Form Wants a PDF Instead
Some portals particularly university admission systems and a few government recruitment boards ask for the combined photo-and-signature file as a PDF rather than a JPG, especially when it’s bundled together with other documents like a CNIC copy or educational certificates.
In that case, merge the photo and signature into one JPG first using the steps above, then run that finished JPG through a JPG to PDF converter alongside your other documents, rather than converting each document separately and hoping the final PDF holds together cleanly.
A Note on Reusing the Same File
Once you’ve built a photo-and-signature file that meets one board’s specifications, it’s tempting to reuse it everywhere. This mostly works, but check the specific KB and dimension requirements each time you apply somewhere new different boards genuinely use different numbers, and a file built for a 50KB limit won’t automatically pass a form capped at 20KB. Keep the original high-quality merged version saved separately, and re-compress a fresh copy for each new application rather than repeatedly re-compressing an already-compressed file, since each additional compression pass degrades quality a little more.
Frequently Asked Questions
Can I merge my photo and signature without a scanner?
Yes. A phone photo of your signature on plain white paper, taken in good natural light and cropped tightly, works fine for almost every portal. A scanner produces a slightly cleaner result, but it isn’t a strict requirement.
Why does my merged file keep coming out bigger than the limit?
This almost always means compression happened before merging instead of after, or the source photo was unusually high resolution to begin with. Merge first at full quality, then compress the final combined file to your target KB.
Does the signature have to be black ink?
Most forms don’t specify ink color explicitly, but black or dark blue ink on plain white paper photographs and scans far more cleanly than lighter colors, which can look faint or patchy after compression.
What if the portal doesn’t specify a KB limit at all?
When no specific limit is stated, aim for under 100KB as a safe general target — it’s small enough to satisfy the vast majority of upload systems without a visible quality drop on a photo-and-signature composite this simple.
Can I use the same merged file for multiple different exams?
Only if the dimensions and KB limit happen to match. Since these vary by board, it’s safer to keep an unedited high-quality merge saved and generate a fresh, correctly-sized copy for each application.
The Bottom Line
The photo-and-signature requirement trips people up not because it’s technically difficult, but because most guides only explain the “why,” not the actual order of operations that avoids a rejected upload. Merge first, resize to match widths, compress last, and check the finished file’s exact properties against the form’s stated numbers before submitting. That sequence, done once carefully, is faster than resubmitting after a portal quietly rejects the first attempt.